Smart Switches and Neutral Wires: A Homeowner Guide
Why most smart switches need a neutral wire, how to check if you have one, and what to do if you don't. A plain-English guide for homeowners.
Articles on this site may include sponsored content. If they do, it's labeled clearly - and it still has to answer a real homeowner question. Same bar as everything else here.
Smart Switches and Neutral Wires
You bought a smart switch. You watched the YouTube video. You turned off the breaker, pulled out your old switch - and found three wires where you expected two. Or worse, you didn’t find a wire you needed at all.
Welcome to the most frustrating moment in smart home installation: the neutral wire problem.
Here’s the short version: most smart switches need a neutral wire to stay powered on and connected to your Wi-Fi or Bluetooth. An old mechanical switch doesn’t need one - it just breaks the connection to the light. But a smart switch is a computer in your wall. It needs constant power, and that power comes from the neutral wire. If your switch box doesn’t have one, you’ve got some decisions to make.
I’m Chris Lee. I’ve installed smart switches in houses built in the 1920s and houses built last year. The neutral wire question comes up every single time. Let’s demystify it.
Why Smart Switches Are Different from Old Switches
A standard mechanical light switch is a simple device. When you flip it on, two metal contacts touch and complete the circuit. Power flows to the light. When you flip it off, the contacts separate and the circuit breaks. No power flows. The switch itself doesn’t need electricity to do its job.
A smart switch is fundamentally different. It has:
- A microprocessor to process commands
- Wireless communication (Wi-Fi, Zigbee, Z-Wave, or Bluetooth)
- Relay circuitry to actually switch the light on and off
- Usually an LED indicator
- Sometimes a night light or motion sensor
All of these components need power - even when the light is off. That’s where the neutral wire comes in.
In a standard switch loop, you have a hot wire (black, carrying power from the panel) and a switch leg (the wire that goes up to the light). When the switch is off, the circuit is open - no power flows through the switch to the light. That means a smart switch has no way to draw power for its electronics.
The neutral wire (usually white) provides a return path for current even when the switch is in the off position. The light stays off, but the smart switch gets the trickle of power it needs to stay connected.
What a Neutral Wire Looks Like
If you open your switch box and see a bundle of white wires capped together with a wire nut - that’s your neutral wire. In modern wiring (since the mid-1980s), you’ll typically find:
- Black or red wire - hot (line)
- White wire - neutral
- Bare copper or green wire - ground
- Black or red wire - load (the wire going to the light fixture)
In a switch box with a neutral, you’ll see the white wires. They’re usually pushed to the back of the box, bundled together, and not connected to the switch itself. That’s normal - the old mechanical switch only used the hot and load wires. The neutral was just passing through the box on its way to the light fixture.
In a switch box without a neutral, you’ll only see two or three wires connected to the switch - the hot, the load, and possibly a ground. There won’t be any white wires in the box at all, or the white wire will be used as a hot (which is a common wiring method in older homes).
Why Older Homes Don’t Have Neutrals
Houses built before the mid-1980s often used a wiring method called switch loops. In a switch loop, the power goes to the light fixture first, then a two-wire cable runs down to the switch and back. One wire is the hot, and the other is the switched leg going back to the light. There’s no neutral in the switch box because the neutral stays up at the fixture.
This was perfectly fine for mechanical switches. It’s a problem for smart switches.
If your house was built in the 1950s through the early 1980s, there’s a good chance your switch boxes don’t have neutrals. Some houses built after the mid-1980s also skip them in certain locations, especially if a money-saving electrician ran switch loops instead of bringing power to the switch first.
The National Electrical Code started requiring a neutral wire in most switch boxes with the 2011 code cycle. So homes built (or rewired) after 2011 should have neutrals in switch boxes. Anything older is a toss-up.
How to Check If You Have a Neutral Wire
Before you buy a smart switch, check your switch boxes. Here’s how.
Step 1: Turn off the breaker. Seriously. Don’t skip this.
Step 2: Remove the switch plate. Use a screwdriver and take off the cover plate.
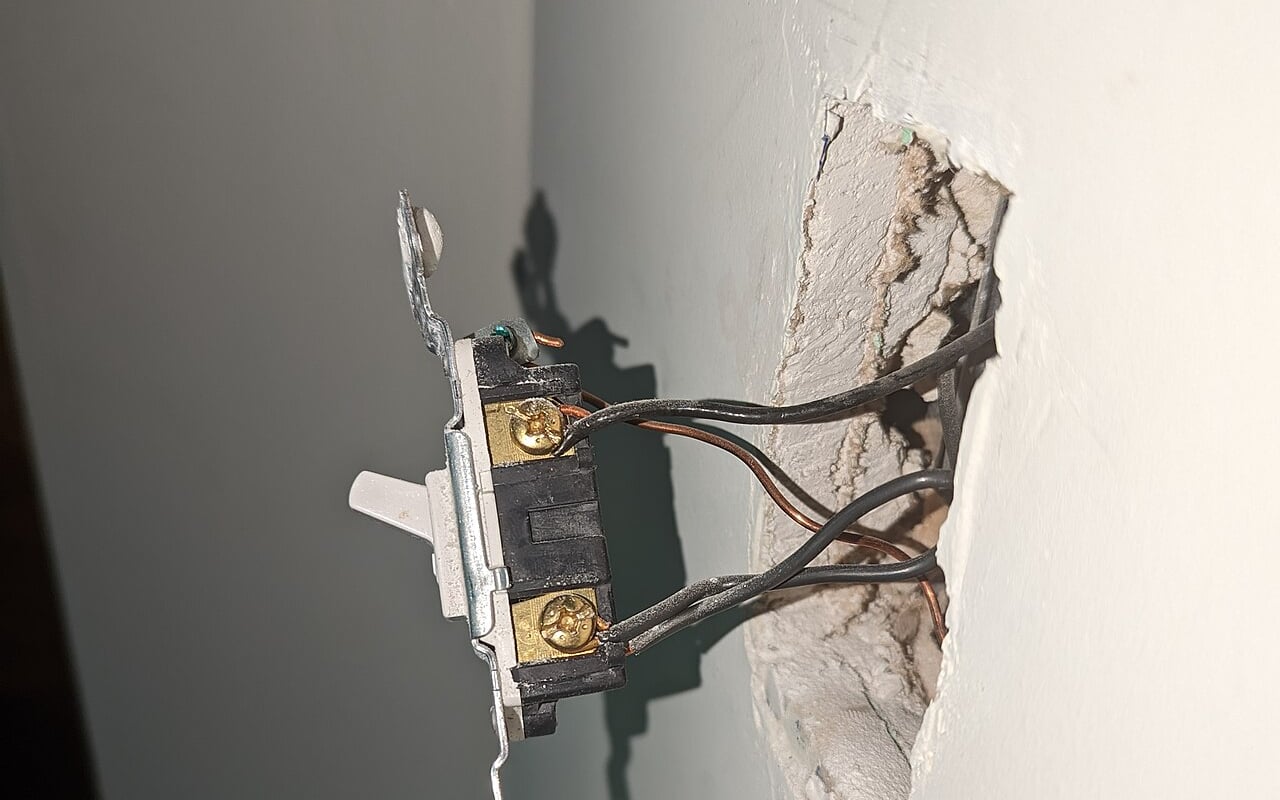
Step 3: Pull the switch out gently. Don’t yank - just pull it far enough to see the wires connected to it.
Step 4: Look for white wires. Are there any white wires in the box? If you see one or more white wires capped together with a wire nut (not connected to the switch), you likely have a neutral.
Step 5: Look for the switch wiring. If your switch has only two wires connected to it (plus a bare ground), and those wires are both black or one black and one white (with the white used as a hot), you likely don’t have a neutral in that box.
Step 6: Confirm with a multimeter (optional). With the power back on, measure voltage between the white wire and the black wire. If you get 120V, that white wire is a neutral.
Take a picture of the wiring before you disconnect anything. Thank me later.
If You Have a Neutral: You’re In Luck
If your switch box has a neutral bundle, installation is straightforward. Most smart switches wire up like this:
- Line (hot) - black wire from the wall to the black wire on the switch
- Load - black or red wire from the wall to the red (or marked) wire on the switch
- Neutral - white wire from the switch to the neutral bundle in the box
- Ground - bare copper or green wire
Follow the manufacturer’s instructions. Some switches use different colors. When in doubt, check the documentation.
Make sure the neutral bundle in your box has room for one more wire. If it’s a tight bundle, add a larger wire nut or a push-in connector rated for the number of wires.
If You Don’t Have a Neutral: Your Options
Here’s where it gets interesting. You have several options, each with trade-offs.
Option 1: Buy a No-Neutral Smart Switch
Some smart switch manufacturers make models that don’t require a neutral wire. These switches work by passing a tiny amount of current through the light fixture itself to power their electronics.
The most well-known example is Lutron Caseta. Lutron’s switches use their proprietary Clear Connect RF technology and don’t need a neutral wire. They’re reliable, work with most smart home systems, and install like a standard two-wire switch.
Other no-neutral options include:
- Aeotec Nano Dimmer (Z-Wave, installs behind the existing switch)
- Fibaro Dimmer 2 (Z-Wave)
- Some Inovelli switches (Z-Wave and Zigbee models)
- Some budget Wi-Fi switches (check the specs carefully)
The catch with no-neutral switches: they need a compatible load. Most no-neutral dimmers require a minimum wattage to work - usually around 10-25 watts. If you have super-efficient LED bulbs that draw only 5 watts total, the switch may not get enough power and can cause flickering or random on/off behavior.
If flicker is the problem you are trying to solve, start with my guide to dimmer switch compatibility before blaming the smart switch itself.
With Lutron Caseta, this is less of an issue because they include a small bypass capacitor that you install at the light fixture to ensure enough current flows. Other no-neutral switches handle it differently.
Option 2: Use Smart Bulbs Instead
If you can’t easily get a neutral wire to your switch, you can bypass the switch entirely. Install smart bulbs (Philips Hue, LIFX, etc.) and leave the wall switch in the on position. Control the lights through your phone, voice assistant, or a wireless remote switch.
The downside: anyone who flips the wall switch off will cut power to the smart bulb, and it won’t respond until the switch is turned back on. You can solve this with a smart switch cover that locks the wall switch in the on position, but that’s a workaround, not a solution.
Option 3: Add a Neutral Wire
This is the most involved option but gives you the most flexibility. A licensed electrician can run a new neutral wire to your switch box. This usually involves fishing wire through the wall from a nearby outlet or from the light fixture.
The complexity depends on your house construction. On a single-story home with attic access, it might be a one-hour job. On a two-story home with finished walls, it could take longer and require drywall patching.
If that neutral wire turns into a bigger wiring project, check when electrical work needs a permit before you open walls or schedule the job.
Typical cost for adding a neutral to one switch box: $100-$300 depending on access and location.
Option 4: Use a Smart Relay Module
A smart relay (like a Shelly 1 or Sonoff Mini) installs behind the switch or at the light fixture. It sits between your existing mechanical switch and the light, adding smart functionality without replacing the switch itself. Some of these can be wired at the fixture (where a neutral is usually available) while keeping your original switch in place.
This is a more advanced DIY option. You’re essentially adding a smart device to the existing wiring. It works well if you’re comfortable with basic electrical work.
If you are not sure where the DIY line is, read what not to DIY with home electrical work before you start moving conductors around.
Common Installation Mistakes
I’ve seen all of these. Let me save you the trouble.
Mistake 1: Using a neutral from a different circuit. Every switch needs to use the neutral from its own circuit. You can’t pull a neutral from a nearby outlet on a different breaker. That’s dangerous - the return current would flow through an unintended path, and you’d have a potential shock hazard. If there’s no neutral in the box, don’t borrow one.
Mistake 2: Forgetting to cap unused wires. Some smart switches have extra wires (like a traveler for three-way setups). If you’re not using a wire, cap it with a wire nut. Loose wires touching metal boxes or other terminals cause shorts.
Mistake 3: Overloading the switch box. Smart switches are physically larger than mechanical switches. They have more electronics inside, which means more heat. If you’re trying to cram a smart switch into a shallow box, you can overheat the components or pinch wires. Use a box extension if needed.
Mistake 4: Ignoring the minimum load requirement. This is especially common with no-neutral dimmers. LED bulbs are efficient - sometimes too efficient for the switch. Check the switch’s minimum wattage and make sure your bulbs (combined) meet it. If they don’t, you’ll get flicker.
Mistake 5: Not checking for a three-way setup. If you have two switches controlling the same light (like at the top and bottom of stairs), you need a different wiring approach. Many smart switches come in three-way kits. Don’t assume a standard smart switch works in a three-way configuration.
Do All Smart Switches Need a Neutral?
Not all - but most do. Here’s a quick breakdown:
- Wi-Fi smart switches (TP-Link Kasa, Meross, Leviton Decora Smart) - almost all require a neutral
- Zigbee smart switches - most require a neutral
- Z-Wave smart switches - most require a neutral
- Lutron Caseta - does NOT require a neutral
- Other no-neutral models - a growing category, check specs carefully
If you’re shopping for smart switches and you don’t have a neutral wire, look specifically for “no neutral required” in the product description. Don’t assume.
Wiring Your Smart Switch - Step by Step
If you have a neutral and you’re comfortable with basic electrical work, here’s the general process.
What you’ll need:
- Smart switch (compatible with your wiring)
- Voltage tester (non-contact or multimeter)
- Wire strippers
- Screwdriver
- Wire nuts or push-in connectors
- Your phone (for app setup)
Step 1: Turn off the breaker. Check with a voltage tester that power is indeed off at the switch.
Step 2: Remove the old switch. Unscrew the mounting screws, pull the switch out, and disconnect the wires. Label them if you’re not sure which is which.
Step 3: Identify your wires. Find the hot wire (the one with power, which you already know is off). Find the load wire (goes to the light). Find the neutral bundle. Find the ground.
Step 4: Connect the new switch. Follow the manufacturer’s wiring diagram. Typically: line to black, load to red, neutral to white, ground to bare copper. Use wire nuts or push-in connectors.
Step 5: Mount the switch. Carefully fold the wires back into the box, making sure no bare wires are touching. Push the switch into place and tighten the mounting screws.
Step 6: Install the faceplate. Screw it on.
Step 7: Restore power. Turn the breaker back on.
Step 8: Set up the app. Follow the manufacturer’s app instructions to connect the switch to your Wi-Fi or smart home hub.
If the switch doesn’t power up after you restore the breaker, you’ve got a wiring issue. Double-check your connections. If everything looks right, call an electrician.
Related Electrical Guides
A smart switch project can reveal other electrical questions in the same box, room, or panel. These guides are good next reads:
- If the switch or nearby outlet feels hot, read warm outlet or switch: when to worry.
- If the circuit trips after you install new controls, start with what a frequently tripping breaker is warning you about.
- If nearby outlets stop working while you are troubleshooting, use the safe checks in dead outlet troubleshooting.
- If you are working in a kitchen, bath, garage, or exterior area, review GFCI and AFCI protection without electrical jargon.
- If the switch box is in an older home, compare the wiring risks in two-prong outlets in older homes and aluminum wiring: what homeowners should know.
- If the house still has very old wiring, read knob-and-tube wiring risks and replacement in older homes.
- If the smart switch is part of a lighting redesign, pair this with recessed lighting planning basics and ceiling fan installation questions about wiring and boxes.
- If you are adding other devices on the same circuit, check dedicated circuits for appliances so you do not overload a general lighting circuit.
Quick Answers
Q: Do all smart switches need a neutral wire?
No, but most do. Most Wi-Fi, Zigbee, and Z-Wave smart switches require a neutral wire. Lutron Caseta is the main one - they make no-neutral switches that work without one. Always check the product specifications before you buy.
Q: How do I know if my switch box has a neutral wire?
Turn off the breaker, remove the switch plate, and pull the switch out gently. Look for a bundle of white wires capped together with a wire nut, pushed to the back of the box. If you see white wires that aren’t connected to the switch, you have a neutral. If you see only black and copper wires (or a white wire used as a hot), you likely don’t.
Q: Can I install a smart switch without a neutral wire?
You can install a no-neutral smart switch (like Lutron Caseta) without a neutral wire. You cannot install a standard smart switch that requires a neutral without one - it simply won’t work. If you already bought a neutral-required switch, you’ll need to either add a neutral wire (call an electrician) or return the switch and buy a no-neutral model.
Q: Why don’t older homes have neutral wires in switch boxes?
Older homes often used switch loops, a wiring method where power goes to the light fixture first, then a two-wire cable runs to the switch. The neutral stays at the fixture, so there’s no neutral in the switch box. This method was common before the NEC started requiring neutrals in switch boxes (around the 2011 code cycle).
Q: Can I add a neutral wire to an existing switch box?
Yes, but it requires running new wire and usually involves fishing through walls. It’s not a simple DIY job in most cases. A licensed electrician can add a neutral to a switch box for $100-$300, depending on access and your home’s construction. In some cases, they can use existing conduit or pull a neutral through an accessible attic or basement.
Q: What’s the best smart switch if I don’t have a neutral?
Lutron Caseta is the most popular and reliable no-neutral smart switch. It works with Alexa, Google Home, Apple HomeKit, and most smart home systems. The starter kit includes a hub and one dimmer. For individual switches, look for the “PD-6WCL” dimmer model. Other options include some Inovelli Z-Wave switches, Aeotec smart dimmers, and select budget Wi-Fi switches - but check for no-neutral compatibility before buying.
Q: Will a smart switch work with LED bulbs?
Yes, but check compatibility. Some smart switches have a minimum load requirement (especially no-neutral models) that your LED bulbs need to meet. If your LEDs are too efficient - drawing only 3-5 watts total - the switch may not work correctly. Most smart switches list a minimum wattage in the specifications. Sum up your bulbs and make sure they meet it.